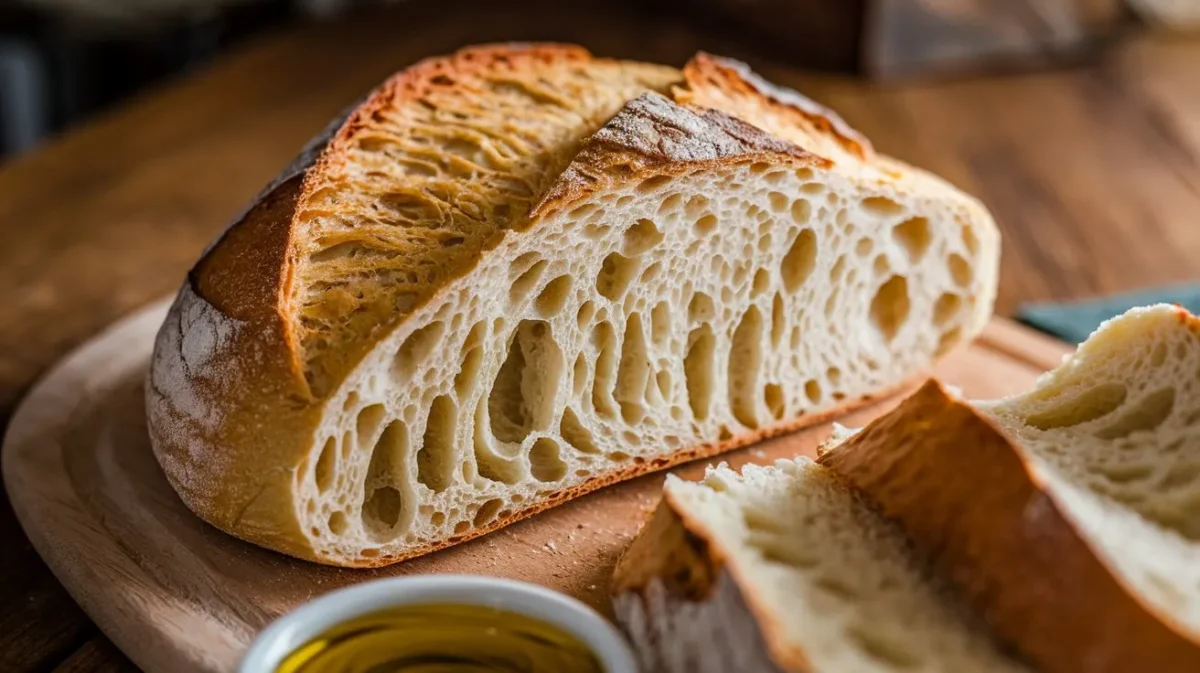
If you’ve ever bitten into a slice of ciabatta and thought, “Why can’t all bread taste this good?”—you’ve already tasted the magic behind a biga recipe. This Italian pre-ferment is the not-so-secret weapon that brings that rustic, chewy, slightly tangy flavor to life. Whether it’s ciabatta, pane pugliese, or even your homemade pizza dough, biga is what gives it that professional bakery vibe.
Biga recipe techniques come straight outta Italy, where bread is a way of life. Bakers there have been using it for generations to level up their loaves with flavor, texture, and shelf life. It’s not complicated—it’s just smart bread-making. And once you try it, there’s no going back to basic dough.
Biga recipe doughs work like a charm whether you’re making crusty artisan loaves, pillowy focaccia, or even pizza that could rival New York slices. Want to get creative in the kitchen? After your bread session, check out this spicy Vegan Jalapeño Cheese Artisan Bread or satisfy your sweet tooth with these chewy Rice Krispie Chocolate Chip Cookies. Bread today, dessert tomorrow.
Table of Contents
What Is a Biga Recipe and Why Does It Matter?
Biga recipe steps are simple: flour, water, yeast, and time. That’s it. But the trick is in how you let those ingredients sit and ferment. Unlike sourdough, which can feel like a part-time job, biga is way more chill. It uses regular active dry yeast and just needs a few hours or overnight to develop flavor. This makes it perfect for home bakers who want that artisan touch without the commitment of feeding a sourdough starter.
How a Biga Recipe Stands Out from Other Dough Starters
Biga recipe methods use a lower hydration level—usually around 60%. What that means for you: a thicker, stickier dough that’s not as wet or loose as poolish (another pre-ferment). That stiffer texture adds structure and chewiness, which makes a huge difference in breads like ciabatta or pizza crust. It’s that “tear it and hear it” kind of bread texture we all crave.
The Magic of Pre-Fermentation in a Biga Recipe
Biga recipe fermentation is where the magic happens. This isn’t just about flavor—it’s about structure, rise, and texture. The long ferment gives your yeast time to break down flour into sugars, building up gas and flavor. The result? A light, open crumb that’s full of tiny air pockets and deep flavor. Quick-rise bread can’t touch this.
This step might seem extra, but trust me, it’s worth it. You get bread that actually tastes like something—bread that doesn’t go stale in a day. Plus, biga helps with gluten development, so the dough holds its shape better. If you want bakery-quality bread without a bakery schedule, biga’s got your back.
Ingredients for the Perfect Biga Recipe
Biga recipe ingredients are super simple. You probably already have them at home. The trick is in how you mix and rest them.
| Ingredient | Amount | Notes |
|---|---|---|
| Bread Flour | 250g (about 2 cups) | High-protein, unbleached for best results |
| Warm Water | 150ml (about ⅔ cup) | Around 100°F / 38°C—filtered or spring water is best |
| Active Dry Yeast | ¼ teaspoon | Make sure it’s fresh for a good rise |
Quick tip: No bread flour? All-purpose will work, but the texture might be a little less chewy. Still delicious though.
Essential Tools You’ll Need for a Biga Recipe
Biga recipe success isn’t just about the ingredients—it’s about having the right tools. Here’s what to grab before you get started:
1. Large Mixing Bowl
Big enough for the dough to triple in size. Glass or stainless steel is best to hold consistent temperature. Bonus: glass lets you peek at your dough rising.
2. Kitchen Scale
This is key for the best results. We’re talking grams here—not cups. It’s more accurate and keeps things consistent every time.
3. Plastic Wrap or Lid
Cover your bowl to trap moisture and keep the dough happy during fermentation. Reusable lids or silicone covers work great too.
4. Airtight Container
If you’re storing your biga in the fridge or freezer, this keeps it from drying out or picking up weird smells.
5. Spatula or Wooden Spoon
The dough’s thick and sticky—don’t even try to use a regular spoon. A strong spatula or wooden spoon does the job right.
6. Optional Tools
- Bench Scraper: Makes it easier to portion and move the dough.
- Thermometer: Double-check your water temp so the yeast gets just what it needs.
- Reusable Towels: Damp kitchen towels are a solid alternative to plastic wrap.
What Makes a Biga Recipe So Good?
Biga recipe doughs are all about flavor and feel. You’ll notice your bread smells better, tastes richer, and has that irresistible pull-apart texture you usually only get from high-end bakeries. Plus, it’s flexible—store it, freeze it, or mix it straight into your main dough recipe. You’ve got options.
And hey, once you’ve got your bread baked and cooling, maybe set the mood with this adorable Butter Candle Recipe—it’s like edible mood lighting. Or if you’re feeling full-on Southern, whip up this Biscuits and Gravy Recipe for your next breakfast bake-off.
How to Make a Biga Recipe Step by Step
Biga recipe steps are super beginner-friendly and don’t need fancy techniques—just a little patience and the right touch. Here’s how to get it right from the very start.
1: Activate the Yeast
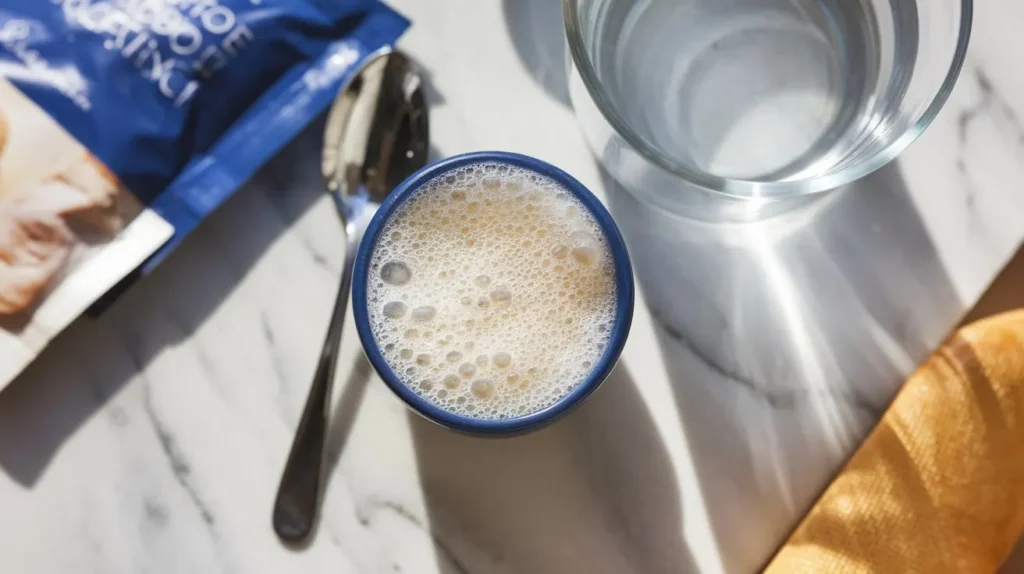
Biga recipe success starts with bubbly yeast. Pour warm water (around 100°F) into a small bowl and sprinkle in the active dry yeast. Stir gently and let it sit for 5 to 10 minutes. You’re looking for a foamy top—that’s your sign the yeast is alive and ready to work. No foam? Toss it and start fresh with new yeast.
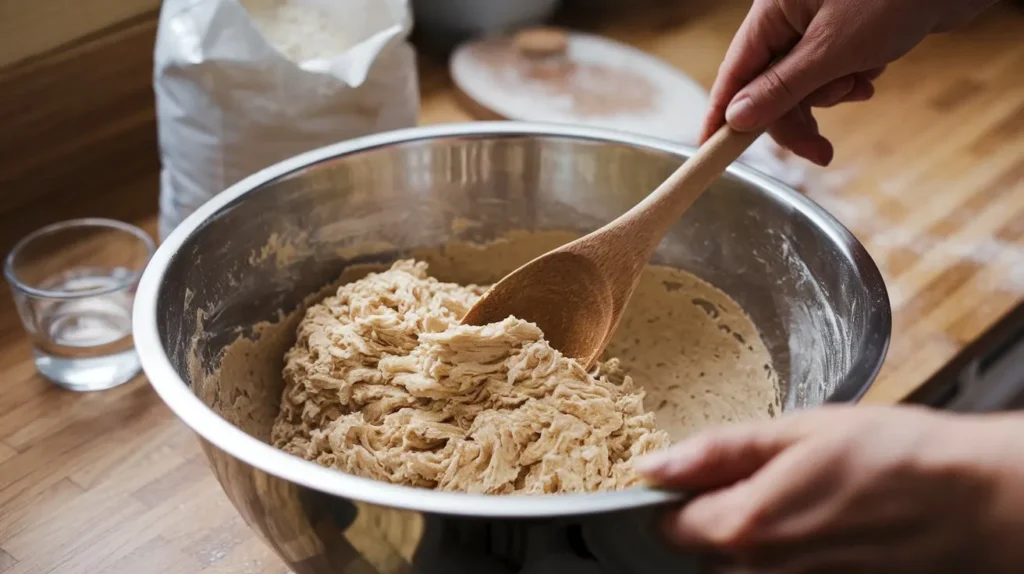
2. Mix the Ingredients
Biga recipe dough doesn’t need kneading, which makes this part super chill. Pour the foamy yeast water into a large mixing bowl with the bread flour. Use a wooden spoon or spatula to stir it all together into a shaggy, sticky dough. That’s exactly how it should look—no need for it to be smooth.
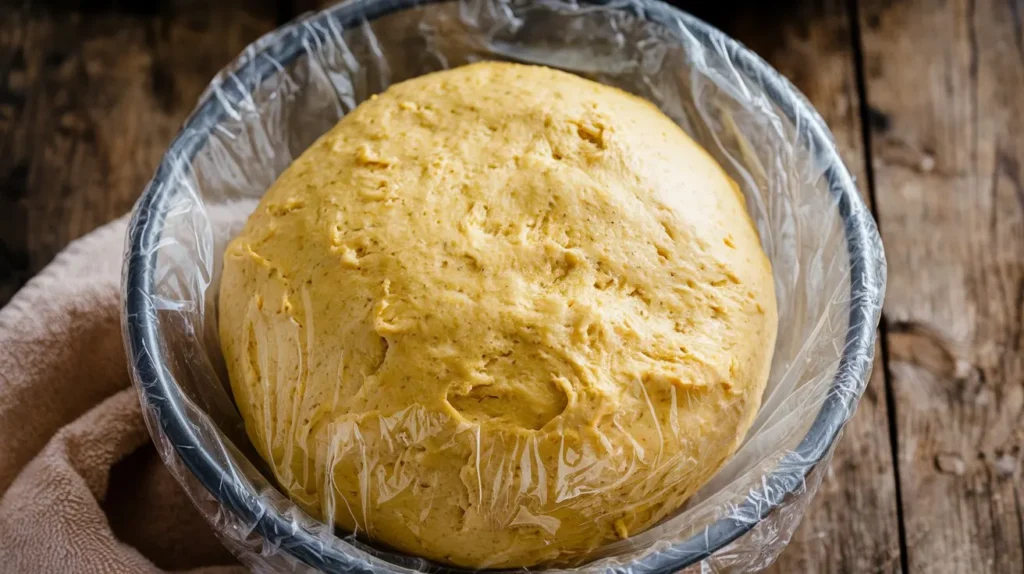
3. Let It Ferment
Biga recipe fermentation is where all the magic happens. Cover your bowl tightly with plastic wrap or a lid, and leave it on the counter at room temperature (around 70°F) for 12 to 24 hours. If your kitchen’s warm, check on it after 8 to 10 hours.
Signs Your Biga Recipe Is Ready:
- It’s tripled in size
- It has a spongy texture with visible bubbles
- You’ll smell that pleasant, tangy aroma
This is key for the best results—don’t skip it!
4. Store for Later
Biga recipe dough can be stored if you’re not ready to use it right away. Move it into an airtight container and refrigerate for up to 5 days. Want to save it longer? Portion it, wrap tightly, and freeze for up to 3 months. Thaw in the fridge overnight, then let it come to room temp before baking.
Baking with Biga Recipe: Delicious Ideas to Try
Biga recipe dough is your ticket to bakery-quality breads at home. You can work it into all kinds of tasty recipes:
1. Ciabatta
Biga recipe ciabatta turns out with that classic chewy bite and big airy pockets. Mix your biga with more flour, water, and a pinch of salt to create a high-hydration dough. This part is up to you—add olives or herbs if you’re feeling creative!
2. Pane Pugliese
Biga recipe versions of this rustic Italian bread are unbeatable. You’ll get a light, slightly nutty crumb and a golden, crackly crust. It’s perfect for slicing and dunking into a bowl of Healthy Chicken and Cabbage Soup.
3. Pizza Dough
Biga recipe pizza dough is a game changer. It gives you that thin, bubbly, crispy crust we all crave. Use it as your base, then load it up however you want—classic margherita, spicy pepperoni, or even white pizza with garlic and ricotta.
Adjusting Dough Ratios with a Biga Recipe
Biga recipe dough usually makes up 30–50% of your total dough weight in most recipes. So if your total dough is 1,000g, aim for 300–500g of biga. If your final dough seems too dry or too wet, tweak the hydration as needed based on your flour type.
Storage and Maintenance Tips for a Biga Recipe
Biga recipe prep doesn’t end with fermentation. How you store it matters if you want consistent results.
Refrigeration
Keep your biga in an airtight container for up to 5 days. Stir it daily to keep the hydration even and prevent funky smells.
Freezing
Split your biga into portions, wrap them tight in plastic, and stash them in freezer bags. It’ll stay fresh for 3 months. When you need it, thaw in the fridge overnight.
Reviving a Biga Recipe
Biga recipe dough can be refreshed if it’s been hanging out in the fridge too long. Just mix equal parts biga, flour, and water, and let it sit for 6 to 8 hours. That’ll bring it back to life and boost fermentation.
Watch Out for These Spoilage Signs:
- Funky sour smell
- Mold or weird colors
- Watery layer floating on top
If it looks or smells off, don’t take chances—just make a fresh batch.
Serving Suggestions: How to Enjoy Bread Made with Biga Recipe
Biga recipe breads deserve the spotlight at the table. Tear up a warm ciabatta and dip it into good olive oil with balsamic vinegar for a perfect starter. Pane pugliese? That goes amazingly with soups, stews, or even toasted with butter and jam. You can even try your hand at a Perfect Kaiser Roll using your biga for next-level breakfast sandwiches.
Tips for Beginners: Troubleshooting Your Biga Recipe
Biga recipe troubles? Don’t stress—we’ve all been there. Here are some quick fixes and smart adjustments:
- Warm Kitchen? Cut down on fermentation time to avoid over-proofing.
- Cold Kitchen? Place your bowl near the stove or on top of the fridge.
- Sticky Dough? Don’t add extra flour—just flour your hands and tools.
- Expired Yeast? Always check your dates. Old yeast = flat dough.
- Skipped Fermentation? That’s where all the flavor lives. Don’t skip it.
The Science Behind the Biga Recipe: Why It Works So Well
Biga recipe fermentation does more than just fluff up your bread. As the enzymes go to work, they break down starches into sugars, which feed the yeast and make your dough rise. That’s what gives your bread those beautiful bubbles and a soft, chewy texture.
The gluten also strengthens as it rests, so your dough holds its shape better and bakes up with a crusty exterior and pillowy center. Even though biga has a milder taste than sourdough, it still delivers tons of flavor and structure without the weeks-long commitment.
Want to level up from biga later? You can play around with other starter techniques like using a roux in beef stew or even get creative with dough enrichments. But biga’s the perfect start.
FAQs About Biga Recipe
What is the ratio for biga?
The standard biga recipe ratio is:
100% flour
60% water
0.1% to 0.25% active dry yeast
In everyday measurements, that looks like:
250g (2 cups) bread flour
150ml (⅔ cup) warm water
¼ teaspoon active dry yeast
This creates a stiff, sticky dough that ferments slowly, building flavor and structure.
Is biga dough worth it?
Biga dough is absolutely worth it. If you love bread that’s airy inside, crisp outside, and full of deep flavor, then biga is your best friend in the kitchen. It gives you that artisan-style quality—without having to maintain a sourdough starter.
✅ Better texture
✅ Stronger rise
✅ Longer shelf life
✅ More flavor, with less effort
It’s a solid upgrade from basic dough and brings your homemade bread to the next level.
What kind of flour is best for biga?
The best flour for a biga recipe is bread flour. Here’s why:
High protein (gluten) helps the dough hold its shape
Strong structure is needed during long fermentation
Elasticity gives you that chewy, open crumb
If you don’t have bread flour, you can use all-purpose flour. Just know the crumb might be a little tighter and less chewy—but still tasty!
Stick with unbleached flour if possible. Bleached flour can mess with gluten development and affect the final texture.
Is biga better than poolish?
It really depends on what you’re baking and the texture you’re after. Biga and poolish are both types of pre-ferments that build flavor and structure in bread, but they work a little differently.
Biga is a stiffer, low-hydration dough. It’s thick, slightly dry, and creates breads with a chewy crumb and a sturdy crust. If you’re making something like ciabatta or pizza dough and want a lot of bite and structure, biga is a great choice. It gives you that artisan bakery-style chew.
Poolish is wetter—basically equal parts flour and water. It creates a looser, batter-like mixture that’s great for lighter breads. If you’re going for baguettes, sandwich loaves, or anything with a softer, open crumb, poolish might be the better pick.
So, is biga better than poolish?
Not exactly—it’s just better for certain breads. If you want chewy, rustic texture and stronger dough, go with biga. If you want soft, airy, and slightly tangy loaves, poolish might be the way to go.
Bottom line: both are awesome. Pick the one that matches your bread goals.
Final Thoughts on Mastering a Biga Recipe
A good biga recipe isn’t just another step—it’s the move that takes your bread from “pretty good” to “wow, did you make this?” It’s simple to prepare, doesn’t require fancy tools, and delivers big flavor and pro-level texture every single time.
Whether you’re baking chewy ciabatta, rustic pane pugliese, or crisp-edged pizza crust, biga brings depth, strength, and serious character to your dough. It’s the perfect intro to artisan bread-making without the full-time commitment of sourdough.
So if you’re looking for that golden-brown crust, those perfect air pockets, and bread that tastes like it came from a brick oven bakery—you’ve found your secret weapon.
Try it out. Have fun with it. Make a batch this weekend and impress everyone at the table. Because once you start using biga, there’s no going back.
Now go preheat that oven—you’ve got magic to bake.