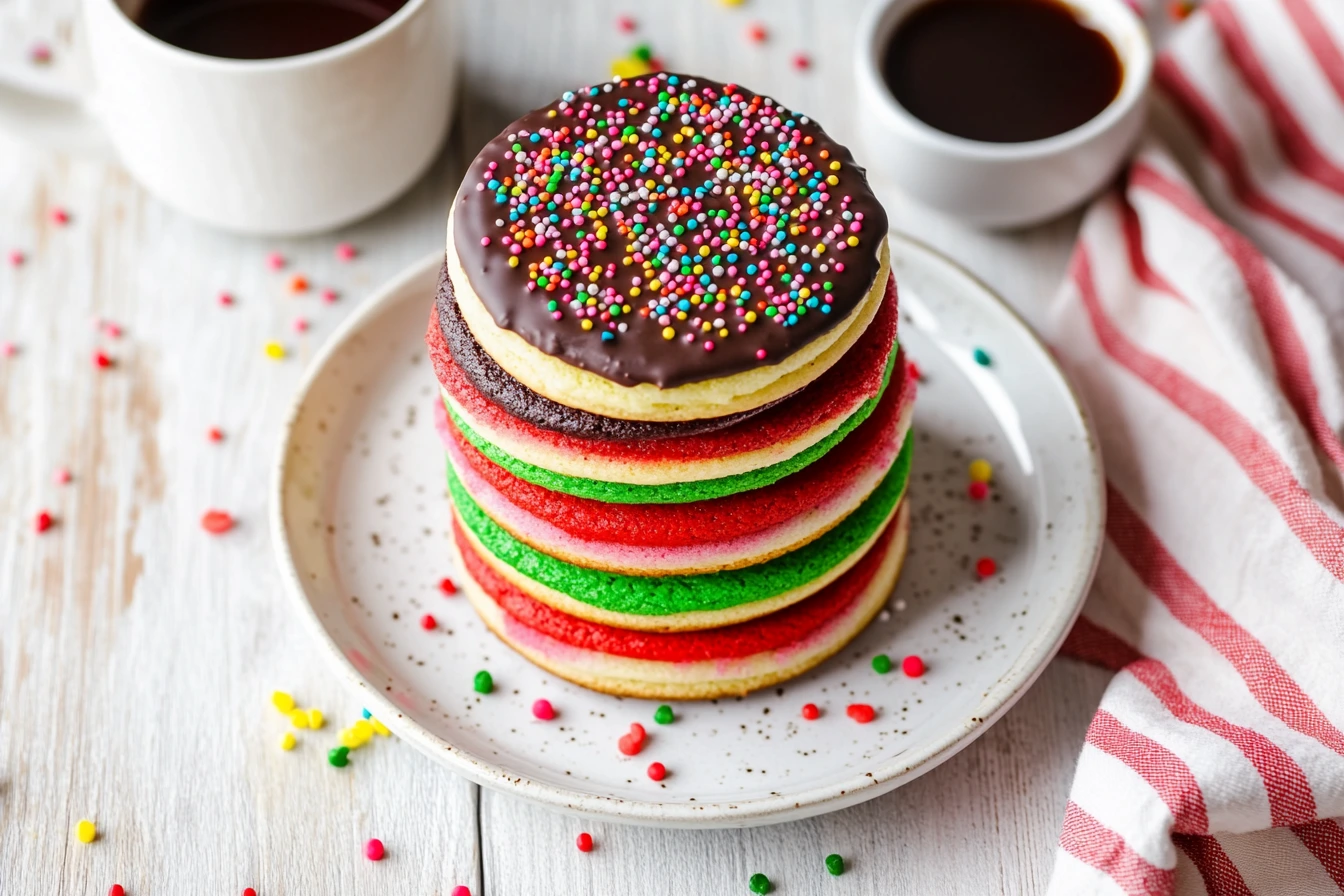
Baking isn’t just about satisfying sweet cravings—it’s about creating memorable moments and indulging in creativity. Rainbow cookies are the perfect dessert for any occasion, offering a beautiful blend of vibrant layers and almond-rich flavor. Whether it’s for a birthday, holiday gathering, or simply because you feel like baking something special, these cookies are guaranteed to impress.
Interestingly, crafting rainbow cookies requires the same level of care and precision as preparing a crab brûlée recipe. While both recipes differ significantly in flavor, they share the need for patience and attention to detail. By following these steps, you’ll achieve bakery-quality cookies that everyone will rave about.
What Are Rainbow Cookies?
Rainbow cookies, also known as tricolor cookies, are a staple of Italian-American bakeries. Despite being called “cookies,” they are more akin to thin almond cakes layered with jam and topped with chocolate. Their striking red, green, and plain layers were traditionally inspired by the Italian flag, but modern versions often feature playful color combinations for various celebrations.
Although these cookies are deeply rooted in tradition, they’ve evolved to suit modern tastes. For example, some bakers swap the almond flavor for pistachio or incorporate different types of jam, offering endless possibilities for customization. No matter how you make them, rainbow cookies are a dessert that brings joy to any table.
Additionally, these cookies are an excellent conversation starter. Their visually stunning layers and rich flavor make them a must-have for anyone who loves unique, eye-catching desserts.
Ingredients Needed
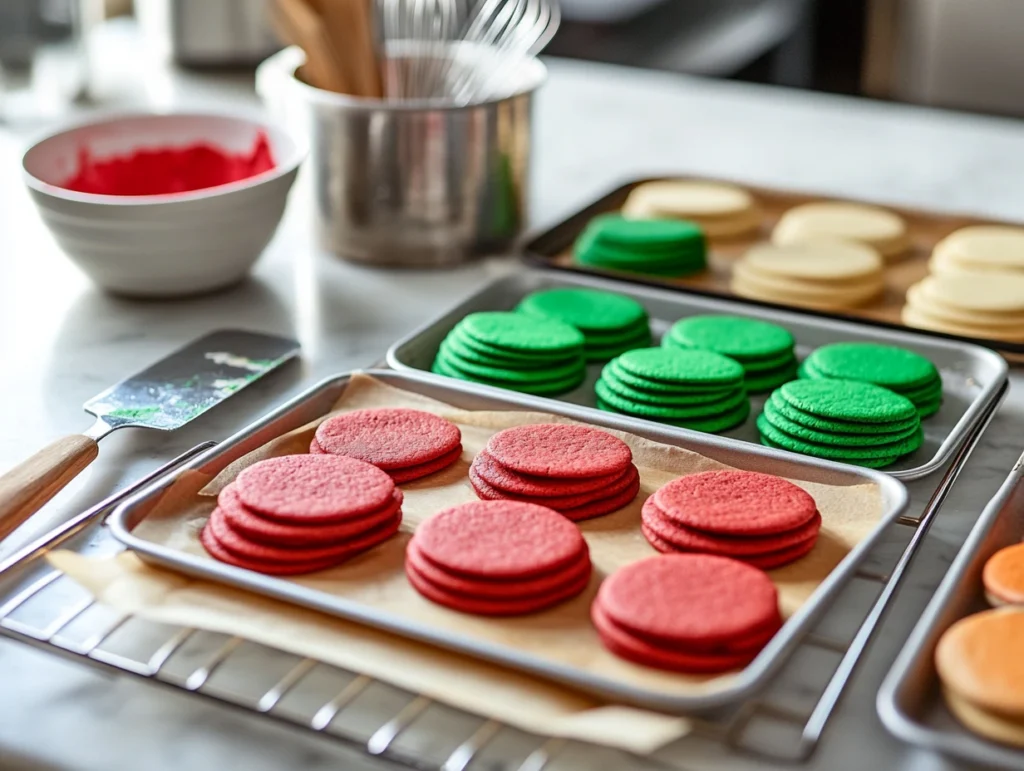
Before starting, it’s crucial to have all the ingredients ready. By doing so, you’ll make the baking process smoother and more enjoyable.
| Ingredient | Quantity | Purpose |
|---|---|---|
| Almond paste | 1 cup | Provides the rich, nutty base flavor |
| Unsalted butter | 1 cup (softened) | Adds moisture and tenderness |
| Granulated sugar | 1 cup | Sweetens and stabilizes the layers |
| Eggs | 4 large | Binds the ingredients and adds richness |
| All-purpose flour | 2 cups | Provides structure to the layers |
| Food coloring (red, green, etc.) | As needed | Adds vibrant colors to the layers |
| Raspberry jam | ½ cup | Creates a tart, fruity contrast |
| Apricot jam | ½ cup | Balances the flavors with subtle sweetness |
| Semi-sweet chocolate chips | 1½ cups | Creates the glossy topping |
While this is the traditional ingredient list, you can make adjustments based on dietary preferences. For example, if you’re looking for a nut-free version, almond paste can be replaced with marzipan or a sugar-and-cream-cheese blend. Moreover, you can experiment with different jams to match your personal taste.
Step-by-Step Instructions
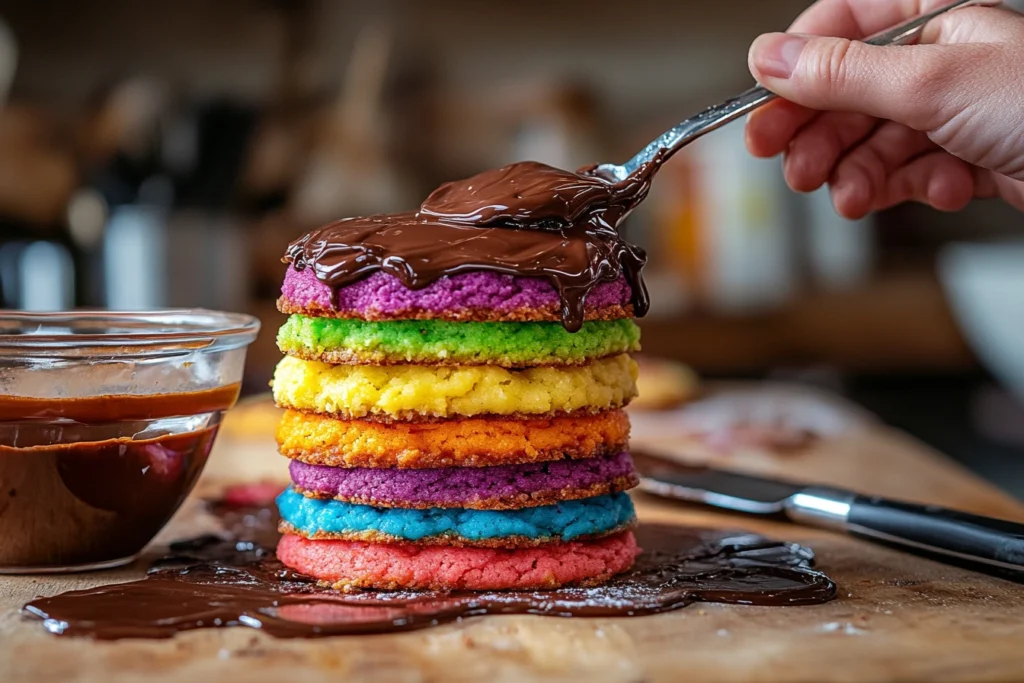
Now that your ingredients are prepped, it’s time to get started. Each step is important, so following the process closely will help ensure your cookies turn out perfect.
1. Preparing the Dough
To start, combine the almond paste, butter, and granulated sugar in a mixing bowl. Beat the mixture until it becomes light and fluffy, which helps create a soft, tender crumb. Then, add the eggs one at a time, mixing thoroughly after each addition. This step ensures the dough is moist and cohesive. Finally, sift in the flour gradually, blending until everything is just combined.
It’s essential to avoid overmixing, as this can make the layers dense instead of soft. If the dough feels too sticky, refrigerate it for about 15 minutes to make it easier to handle. As you prepare the dough, remember that the process requires focus, much like crafting a crab brûlée recipe, where precision is key.
2. Coloring the Dough
To ensure the best results, start by dividing the dough into three equal portions. Afterward, color one portion red and another green, while leaving the third portion plain. Additionally, it’s recommended to use gel food coloring, as it creates vibrant hues without altering the dough’s consistency.
Next, gently knead each portion until the color is evenly distributed. Meanwhile, you can take this opportunity to experiment with different shades or even pastel colors for a unique touch. For example, light blue and yellow could work wonderfully for spring-themed cookies. Ultimately, the choice of colors depends on the occasion, making this step both creative and enjoyable.
3. Baking the Layers
Preheat your oven to 350°F (175°C) and line three 9×13-inch baking pans with parchment paper. Spread each portion of dough evenly across its own pan. Using an offset spatula helps achieve a smooth, uniform layer.
Bake the layers for about 10-12 minutes, or until they are just set. It’s important not to overbake, as this can make the layers too dry. Allow the baked layers to cool completely before proceeding to the next step.
4. Assembling the Layers
To assemble the cookies, start by placing the green layer on a flat surface. Spread a thin layer of raspberry jam over the top, ensuring even coverage. Next, stack the plain layer on top and spread apricot jam across it. Finally, place the red layer on top.
Wrap the entire stack tightly in plastic wrap and place a heavy object, such as a baking sheet or cookbook, on top to compress the layers. Refrigerate for at least 8 hours or overnight. This step helps meld the flavors together while ensuring the layers stay compact for easier slicing.
5. Adding the Chocolate Topping
Once the layers are set, melt the semi-sweet chocolate chips in a double boiler or microwave until smooth. Spread the melted chocolate evenly over the top layer using a spatula. For an extra smooth finish, tap the surface gently to eliminate air bubbles.
Allow the chocolate to cool and harden at room temperature before slicing the cookies. To achieve clean edges, use a sharp knife dipped in hot water and wiped dry between cuts.
Tips for Perfect Rainbow Cookies

Even with a detailed recipe, a few helpful tips can make the process easier and the results better.
- Chill the dough: This helps maintain sharp edges and prevents the layers from spreading during baking.
- Use parchment paper: It prevents sticking and makes transferring the layers simple.
- Slice with a hot knife: This technique ensures clean, precise cuts, making your cookies look professional.
These tips may seem small, but they can have a big impact on the final product.
Creative Variations
Rainbow cookies are endlessly customizable; therefore, they are perfect for experimenting with both flavors and designs. Moreover, their versatility allows bakers to adapt them for any occasion, whether it’s a festive holiday or a casual gathering. Consequently, you can create unique variations that suit your personal taste and style, ensuring these cookies always feel special and one-of-a-kind.
1. Fun with Flavors
- Replace almond paste with pistachio paste for a unique nutty flavor.
- Use orange marmalade or strawberry jam instead of raspberry for a fruity twist.
- Add a hint of vanilla or orange zest for an aromatic boost.
2. Visual Enhancements
- Sprinkle edible glitter or colored sugar over the chocolate for extra flair.
- Use cookie cutters to create shapes like stars, hearts, or flowers for themed events.
These variations not only make the cookies visually appealing but also add a personal touch that your guests will appreciate.
Storing and Serving Rainbow Cookies
To keep your cookies fresh, store them in an airtight container in the refrigerator for up to one week. For longer storage, wrap them tightly in plastic wrap and foil, then freeze for up to three months. Before serving, allow frozen cookies to thaw in the refrigerator overnight.
Rainbow cookies pair wonderfully with beverages like coffee, tea, or even dessert wines. Whether served on a dessert platter or as a standalone treat, they’re guaranteed to be the star of any gathering.
Pairing Rainbow Cookies with Drinks
Pairing these cookies with the right drink can elevate the experience.
- Coffee or espresso: The rich, bitter notes balance the sweetness of the cookies.
- Tea: Herbal or floral teas like chamomile offer a delicate contrast.
- Milk: A simple, classic choice that complements the almond and chocolate flavors perfectly.
Offering thoughtful drink pairings makes serving these cookies even more enjoyable.
Conclusion
Rainbow cookies are more than just desserts—they’re little works of art that bring joy to those who make and eat them. With their vibrant layers, almond-rich flavor, and decadent chocolate topping, they’re a guaranteed hit at any event.
While the process requires patience, the results are well worth the effort. So, the next time you’re in the mood for a baking project, give these colorful treats a try. With practice and creativity, you’ll soon master the art of rainbow cookies, just like a chef perfecting a crab brûlée recipe.
FAQs
- Can I make rainbow cookies without almond paste?
Yes, you can substitute almond paste with marzipan or a mixture of cream cheese and sugar. - What’s the best way to ensure even layers?
Use an offset spatula to spread the dough evenly, and compress the layers with a heavy object during refrigeration. - How long do rainbow cookies last in the freezer?
They can last up to three months if wrapped tightly in plastic wrap and foil. - Can I use dark chocolate instead of semi-sweet?
Absolutely! Dark chocolate adds a rich, bittersweet flavor to the cookies. - What are some beginner-friendly tips for making rainbow cookies?
Chill the dough for easier handling, use parchment paper to prevent sticking, and slice the cookies with a hot knife for clean edges.
For more delicious recipes and inspiration, visit Batchrecipes

